1 June 2020 - 26 July 2020 ( week 8 - week 15 )
Ahmed Baahy Suhail (0333925)
3D modeling
Final project
INSTRUCTIONS
FINAL PROJECT - 3D Character Workflow
Mr. Kannan decided to combine project 2 and the final project due to time constraints. That way, we'll also understand the complete workflow of 3D character creation. The character I decided to come up with is a stylized boy that is obsessed with birds and acts as a guardian. Here is my concept.
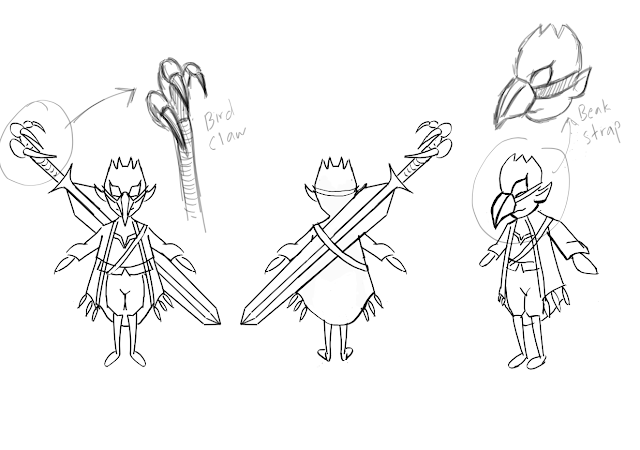 |
Fig 1.1: Concept
|
To start off, I began my block out in Zbrush
 |
Fig 1.2: Block out
|
 |
Fig 1.3: Block out
|
 |
Fig 1.3: Block out
|
After receiving feedback, I decided to remake my block out but with a new tool that we learned called Zsphere.
 |
Fig 1.3: Zsphere block out
|
 |
| Fig 1.4: Zsphere block out |
 |
| Fig 1.5: Zsphere block out |
 |
| Fig 1.4: Zsphere block out |
After my block out was complete, I proceeded to add details onto the body and define the muscles of my model. I wanted to go for a stylized approach therefore as I was sculpting, I looked at examples for reference.
 |
Fig 1.5: Process of sculpting
|
 |
| Fig 2.1: Detailing head |
 |
| Fig 2.2: Fixing eyes |
 |
Fig 2.3: Fixing hand
|
 |
Fig 2.3: Re-positioning hand
|
 |
| Fig 2.4: Hand fixed |
After the main details on the body were added, I began the extraction process for the clothes, hair etc.
 |
| Fig 2.5: Extraction process pants |
 |
| Fig 2.6: Pants extracted |
 |
| Fig 3.3: Model back view |
 |
Fig 3.4: Model side view
|
 |
Fig 3.5: Model top view
|
Mr. Kannan told me to fix how the T-shirt looked from the back therefore I proceeded to amend the folds of it.
After that was done, I went on to create low poly versions of all my subtools using Zremesher.
 |
Fig 3.6: Making low poly of subtools
|
After all the low polys were created and saved, I encountered an error in Zbrush where every time I tried to save, it would show me this message and not allow me to save the model. Thankfully, this happened at the last minute when my model was fully ready for retopology therefore I was very relieved.
 |
Fig 3.7: Error message
 | Fig 3.9: Retopology process
|
|
 |
Fig 3.8: Retopology progress
|
After finishing retopology, I went on to import all my low polys into Maya.
 |
| Fig 3.9: Low poly model imported |
I then began to UV map and baking of all the different subtools. Here are some screenshots of the process.
 |
Fig 4.7: Opening up model in Substance Painter
|
 |
Fig 4.8: Model ready to be colored and textured
|
 |
Fig 4.9: Experimentation in Substance Painter
|
 |
| Fig 5.1: Adding final materials in Substance Painter |
Once I was done with the texturing and finalized the colors, I rendered the final product.
 |
| Fig 5.2: Final render |
 |
| Fig 5.3: Final render |
 |
Fig 5.4: Final render
|
 |
Fig 5.5: Final render
|
 |
| Fig 5.6: Final render |
 |
Fig 5.7: Final render
|
 |
| Fig 5.8: Final project poster |


Comments
Post a Comment