28 August 2019 - 28 November 2019 ( week 1 - 14) Ahmed Baahy Suhail (0333925)
Video and Sound Production
Final Project- Stop motion
INSTRUCTIONS
Final project - Stop motion For our final project, we were assigned to create a one minute minimum stop motion with a partner. First, we were asked to find three stopmotion videos that inspire us. These are the videos I found most interesting.
1. Dimensions of dialogue (1982) - Jan Svankmajer
`This video is actually the second segment of a short film by Jan Svankjer in which he explores the dimensions of dialogue and the importance of communication. This particular segment is called "Passionate Discussion" The concept behind this video is pretty reminiscent of society and how people rush into relationships and make sudden decisions without understanding the consequences and the only way they deal with this shame is to blame each other. This is very well presented through the clay. Passion is very well conveyed when the clay molds fluidly into one and the message is clear. I like clay stop motions specifically because you can manipulate it to any extent and create anything you want. There are just endless possibilities you can come up with, with clay and I'd love to explore that.
2. Shiny- Daniel Cloud Campus
I remember seeing this in class and I kept thinking, why did this particular stop motion stick to my mind longer than the others. I love how they capture so much without having to show a face whatsoever. This missing aspect of the characters leaves the audience to visualize the characters for themselves and hence, captivates them even more. The choreography of the scenes is beautiful to watch and it is interesting how he can create so much movement without having to move the camera at all. The sequence where the people become like waves was just so fascinating and the smoothness of the transitions are amazing.
3. Lost and Found - Andrew Goldsmith & Bradley Slabe
This story is too deep to the heart. The dinosaur unravels itself to save the love of it's life. So much emotion is packed into this and the composition and lighting are magnificently done to capture so much love, perseverance, hope and so much more. It is crazy how you can make objects move and create so much emotion through stop motion. You make the impossible, possible through just a series of pictures and if done right, you can come up with something so raw and pure, something like this. The flashbacks in the final moments add to the emotion and execute the feeling of nostalgia very well.
First idea proposal:
I am still thinking about the story and the message I want to portray but I know that I want to work with clay. I was especially interested in Jan Svankmajer's work since it is very vintage and the message behind is short film's are very dense. I was also attracted to his work as he creates humans and manipulates them with with clay and I have always been interested in the details of people and their features and Jan breaks these features down and manipulates them in creative but effective ways. For the time being, my stop motion idea is to create a non dialogue scenario between people, mainly derived from a relatable issue. Still uncertain of specifics but maybe I can also work with a person who is struggling to find their other half, literally. I want to work with clay. The visual style is like a Jan Svankmajers video,. (refer to the video above) I want the selling point to be the message of my short film and the fluidity of my movements.
We were encouraged to think about our materials as well as choose a partner for this project. For my stop motion, I felt like clay would be very fun to work with as I can mold it into whatever shape I want, and I find the fluid movements of claymation very captivating and hoped to test it out on my own. My partner for this project was Syaqiel. I shared my ideas with him and he suggested some improvements to the story.
Syaqiel's Idea intertwined with my idea of having a clone of a character included:
-A guy walks down in an alley, hurt
-sees his reflection
-distracted and confused
-reflection comes out
-shocked
-reflection copies movements of guy
-slowly becomes him
-guy gets stuck in mirror
-reflection shatters glass leaving guy trapped
-reflection walks away
Mr Martin told me to have a brief story outline ready so after discussing with Syaqiel, I made one to show my teacher for feed back.
Feedback: Mr Martin said the idea is interesting but to think about ways to connect the beginning to the whole story. He said currently, even without the beginning, the story would make sense so as of now it adds no value or connection to the story. Explore ways to connect the beginning to the end and make it an overall captivating story. Also, think about the interaction scene where the clay comes out. There is a lot we can do with that. He gave an example of how reflection B can mimic character A and suggested them upping the notch in terms of mimicking each other. The part where character A falls in the mirror could be because reflect B pretends to fall and A copies B this time and in turn, trips and falls in the mirror.
Our next task was to create a rough animatic of our scenes and how our stop motion could potentially look like, so I went on to make sketches to turn into an animatic of how story outline in Illustrator and this is the outcome.
Fig 1.1: Storyboard
Below is the animatic we showed our teachers.
Feedback: My teachers said there is a lot of potential with our story. Since, the animatic was pretty rough, we had to explain the story as the video went on. Mr Hafiz said that it is important to show the change in the characters personality before and after as the reflection ideally takes over the original character. They said to make the scene were the reflection comes out very interesting and well designed. Also again, we were told to make the connection from the beginning of the story to the end much more evident and maybe empathize on the change from character A to reflection B.
For next week, we were assigned to recreate the scene where reflection comes out so we had to work fast as we needed to get a lot of materials.
Essentially, in response to our feedback, we decided to have the character run out of an argument in the beginning, sad and confused but deep down frustrated, and this negative energy is intensified as he looks at himself in the mirror. The goo that comes out is a symbol of the characters true subconscious, who's emotion is purely anger, due to the argument that just happened. The characters' subconscious is much more stronger than he himself thus takes over his body and attacks the wife in the end.
Below is the renewed slides with a more detailed description of our final story as well as the meaning behind our title, "The Monsters We Make"
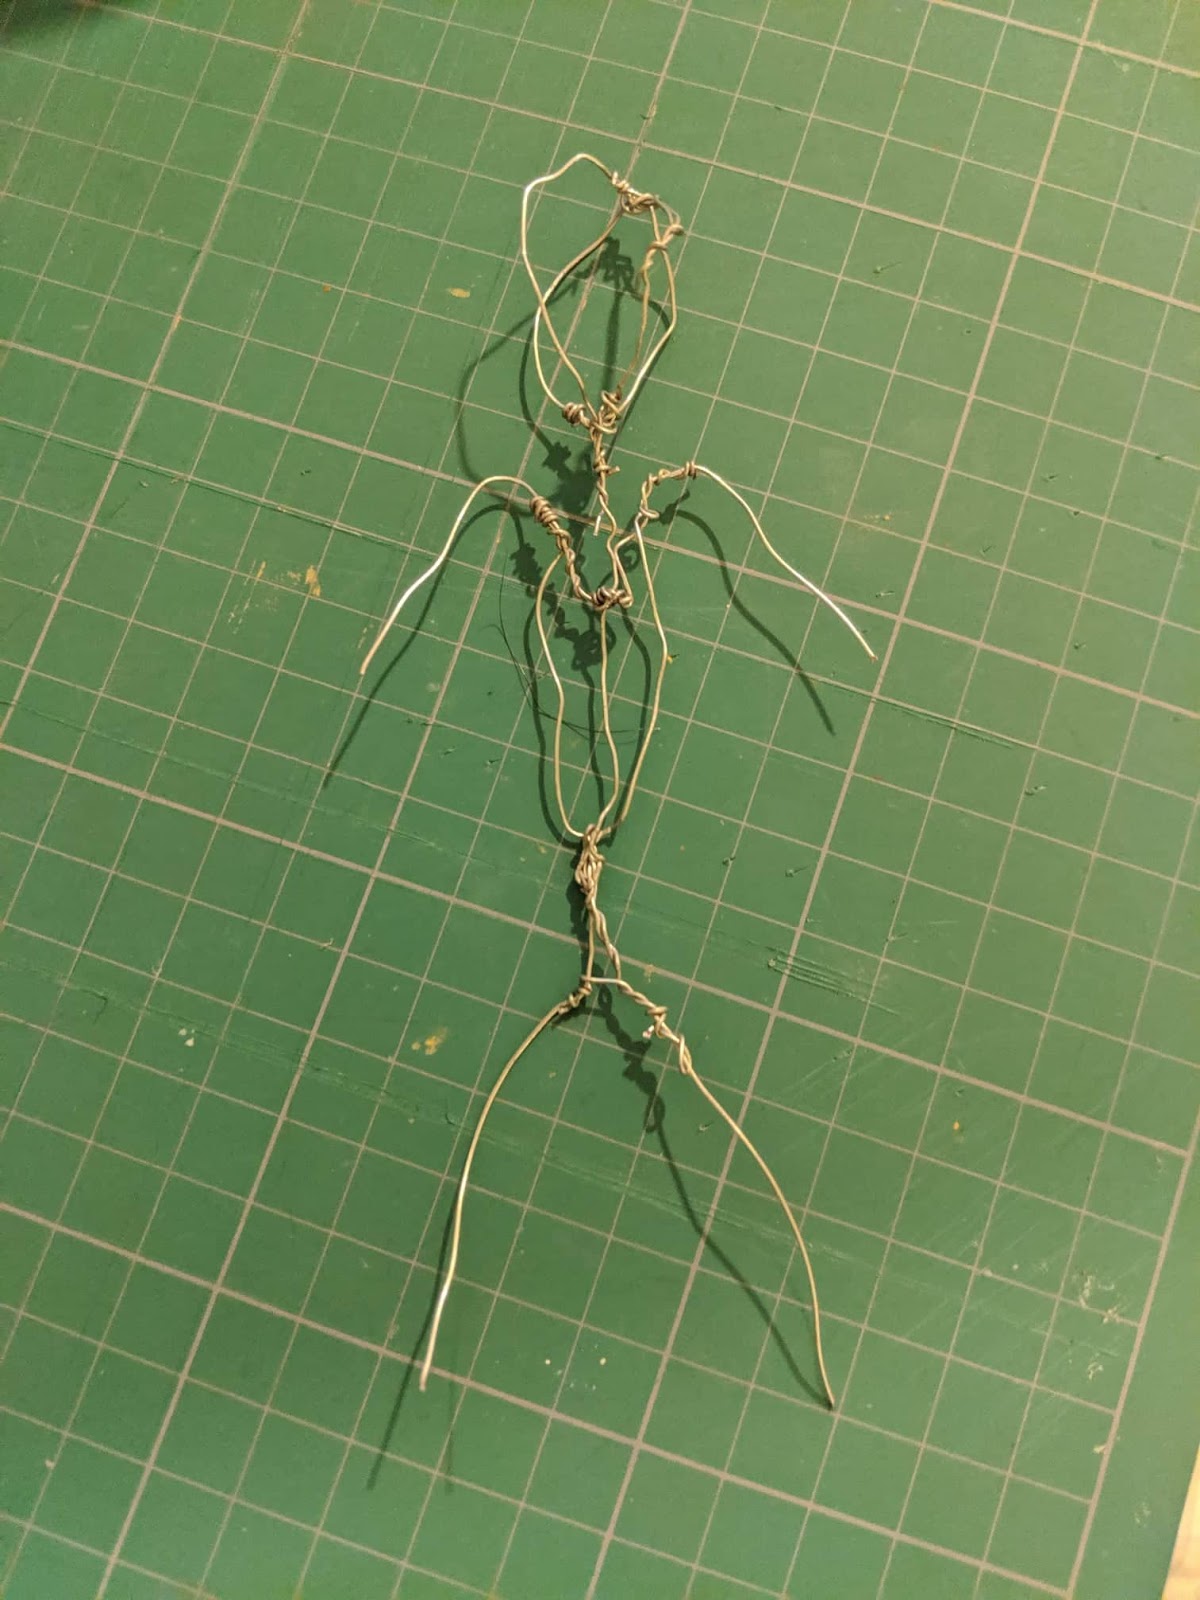
We then began preparing to shoot the test scene of the reflection coming out. To make the two characters, I had to think of how to make them stand and be stable, so I got 1.8mm wires to build the foundation of the characters. I had to make sure both the characters were the same size as the reflection was a clone, meaning the dimensions would have to be same to make it look like the same person.
Fig 1.2: Wire foundation
Fig 1.3: Wire foundation
I was unsure at first what type of clay to get but was recommended air dry clay, thus I first got light polymer clay in order to create the characters.
Fig 1.4: Light polymer clay
Here are the two characters I made side by side. I did my best to make them look the same.
Fig 1.5: Characters made for first trial shoot
We decided to first test out a draft of the scene during a class break, on one of the tables just to visualize how our final test shot can look like. We did not have all the right materials such as the set up so we used a book cover for this trial shoot. Again, this was a very rough trial phase to get an understanding of the ways in which the clay could come out of the mirror and build up into the character.
Fig 1.6: Process being first trial shoot
Since we took this scene from the phone, it was easy to animate as we just hat to select the sequence of pictures and the phone automatically created the gif, which looks like this.
We did not anticipate how dry the clay would become thus filming this scene was very hard as the characters kept cracking. The wires I used for the foundation also seemed too light and weak as the characters kept falling everytime we tried to move them. Thus, it was a good choice to do a trial shot prior to filming the test scene.
I decided to get a stronger type of clay and realized that the one's I used as a kid always seemed to be strong and less prone to cracking. Thus, I searched around for kids clay and found modelling clay, which appeared to be the right texture for this project. I used the polar modelling clay mainly as it was very easy to work with. I did not have time to get stronger wire yet so I stuck with the same 1.8mm wire.
Fig 1.7: Materials used
I then went onto making a new set of characters for the actual test shot, making them bulkier so that they are more stable this time around. I also made them shorter to match the height of the mirror Syaqiel got.
Fig 1.8: Characters created for final test shoot
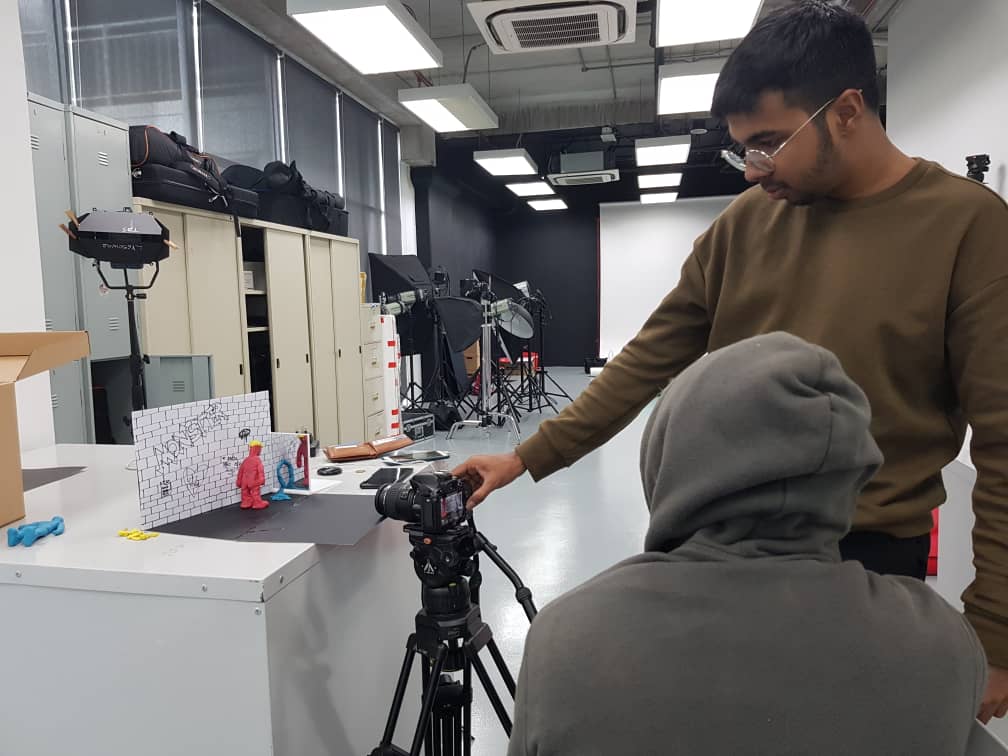
We shot the scene at the corner of the studio and did not need much of a set up as the backdrop was black. My camera was out of charge so we opted to use my phone instead using a phone stand to stabilize the angle. It was a very tight spot to work in but we managed. Here is a screenshot of the scenes from my gallery.
Fig 1.9: Screenshot of gallery for test shots
I then edited the gif in Premier Pro by adjusting the color and lowering the brightness as this scene is meant to be in a dark alley. I also added some sounds to add to the visuals. The final outcome of the test shot is below.
Feedback: Mr Martin said the test shot looks good and was surprised that the quality of the phone camera was good. I asked if we can shoot the rest of our stop motion with the phone but then I realized camera would be the best option and less of a hassle to shoot. He also suggested to add some features to the character.
I then went onto preparing to make the final set of characters and felt that I needed to create a blue character as it was hard to mold during the test shoot itself. Thus, I got more clay as well as a stronger wire, which is the PVC coated wire that you can see below.
Fig 2.0: PVC coated wire to use for final characters
It was much easier to work with and did not hurt to bend as much as the 1.8mm wire. This is how the foundation for the new characters looks like.
Fig 2.1: Wire foundation for final character
Fig 2.2: Wire foundation for final character
I then went onto coating these and did my best attempt to make all three identical.
Fig 2.3: Look of final character side by side
We then went on to make the set up. Since its a dark alley, we felt the need to have a graffiti wall as it is common in a lot of alleys and captures the vibe better. So, Syaqiel got a white piece of paper and created the wall with a marker.
Fig 2.4: Making wall for set up
We also added features as requested but did not want to make it too complicated so added a hat first and eyes using yellow clay. The process is seen below
Fig 2.5: Adding cap to character A
Fig 2.6: Adding features to character A
Fig 2.7: Close up look of character A
For our set up, I got A4 black mounting board and made the dark alley. The set up can be seen from better angles in the following process pictures. We used tape to keep the walls upright as well as to keep the set up from moving during the shoot.
Fig 2.7:Behind the scenes
Fig 2.8: Behind the scenes
Fig 2.9: Behind the scenes
Fig 3.0: Behind the scenes
Fig 3.1: Behind the scenes
Fig 3.2: Behind the scenes
Fig 3.2: Behind the scenes
Fig 3.3: Behind the scenes
Fig 3.4: Behind the scenes
Fig 3.5: Behind the scenes
Fig 3.6: Behind the scenes
Finally, after three days of filming due to unexpected batttery failures of my camera, we were done with our shooting phase.
I then went onto to upload all the frames to Premier Pro one by one. In total , there were 510 frames.
Fig 3.7: Screenshot of frames in Premier Pro
It took a long time to insert all 510 frames.
Fig 3.8: Adding frames to Premier Pro
This is how the stop motion looked after just adding all the scenes.
After the photos were added, I went on to adjusting the color of the video. The theme of our story is primarily a horror and as it is set in a dark valley, I lowered the brightness and increased the contrast. I also reduced the highlights and the whites. The original brightness of the shots were changing thus I had to add adjustment layers to different segments and try to match it so it does not look out of place in any area. I also intentionally left an empty spot to make the atmosphere light up for a split second intensifying the particular moment. This was to hint to a flicker or sudden lightning out of nowhere.
Fig 3.9: Adding adjustment layers to video
Fig 4.0: Adjustment layer color settings
Fig 4.1: Before adjustment layer
Fig 4.2: After adjustment later
Fig 4.3: Before adjustment layer
Fig 4.4: After adjustment layer
After the video was edited, I proceeded to find sample sounds from freesounds.org and searched for all the sounds necessary. Then I went to Adobe audition to individually tweak each sound to my liking and emphasize the sounds the best in accordance to our stop motion. Then, I put the sounds back into premier pro and aligned them to the necessary scenes. The process of adding sound is shown below.
Fig 4.5: Sounds added into multi track in Adobe Audition
Fig 4.6: Adding tweaked sounds back into Premier Pro
Fig 4.7: Process of adding sounds
Fig 4.8: Process of adding sounds
I then put all the sounds back into Adobe Audition and tweaked and increased the scream, shatter and grunt sounds. For example, some of the grunts did not match or sound too alike so I had to adjust them accordingly by using the pitch shifter and parametric equalizer.
Fig 4.9: Tweaking sounds again in Adobe Audition
After making the changes, I exported the mix down back in to premier pro and made some final amendments, minor touch ups here and there.
Fig 5.0: Exporting multitrack mixdown back to Premier Pro
The outcome of all this is seen below. We had to show this in the final week of class to get some last minute feedback in order to make sure the video is the best it can be.
Feedback: Mr Hafiz said that for the sound, some parts feel very empty as I did not add footstep sounds so it feels a bit odd. Also, during the part where the clay comes out of the mirror, he suggested to add a suspenseful sound, to build up to that moment. He also said that the morphing sound of the clay can be much more crisp and exaggerated as it is a bit quiet now. As for the shatter of mirror, it does not sound like a big crack, right now it sounds very light but it needs to be more impactful. Try to add another crack, maybe that will help. He also said that the fighting struggle between the two characters need to be more elaborate. More punch sounds and grunts need to be included. He said to think about how they optimized special effects in movies like Matrix.
Syaqiel was not able to come for the presentation that day thus I shared the feedback with him and he volunteered to make the final amendments for the sound.
The final outcome for our final project stop motion film, "The Monsters We Make" is seen below.


Comments
Post a Comment